Ever rappelled off a flared crack only to hear that sickening creeeak as your cam shifts… and your stomach drops faster than your belayer on a whipper? Yeah. I’ve been there—on El Cap’s East Buttress, no less—when my #2 Camalot walked 6 inches in a shallow flare, leaving me dangling over nothing but granite and regret.
If you’re placing gear in cracks (which, let’s be real, is 80% of trad climbing), understanding crack anchor types isn’t just helpful—it’s life-or-death. In this guide, you’ll learn:
- Why “just shove a cam in” is how accidents happen
- The 5 essential crack anchor types every trad climber must master
- How to evaluate rock quality, crack geometry, and gear placement like a pro
- A terrifying “terrible tip” that could get you killed
Table of Contents
- Why Crack Anchors Matter (Beyond “Don’t Die”)
- Step-by-Step Guide to Placing Crack Anchors
- Best Practices for Each Crack Anchor Type
- Real-World Case Study: When Anchor Choice Saved Lives
- FAQs About Crack Anchor Types
Key Takeaways
- Not all cracks are equal—parallel, flared, tapering, and pin scars require different anchor strategies.
- Passive protection (nuts, hexes) often outperforms cams in thin, clean cracks.
- Directional loading and extension control are non-negotiable for multi-point anchors.
- Never rely on a single piece—even if it’s a bomber #4 Camalot.
- Always inspect for loose flakes, hollow rock, or moisture before placing gear.
Why Crack Anchors Matter (Beyond “Don’t Die”)
Here’s the brutal truth: Over 60% of climbing accidents involving protection failure stem from poor anchor selection or placement, according to the 2023 Accidents in North American Climbing report by the American Alpine Club. And most of those occur in—yep—cracks.
Cracks look simple. You jam something in, clip the rope, and climb on. But rock isn’t Lego. It’s fractured, weathered, and full of surprises. A “solid” looking hand crack might hide a hollow behind-surface; a perfect finger crack could terminate in a flake ready to peel off under load.
Your anchor isn’t just a point in space—it’s a system interacting with geology, physics, and human error. Get it wrong, and you’re not just risking a fall. You’re risking death.
Step-by-Step Guide to Placing Crack Anchors
How do I choose the right crack anchor type for my route?
First, assess the crack’s **geometry** and **rock quality**. Ask yourself:
- Is the crack parallel, flared outward, or tapering inward?
- Is the rock solid granite, brittle sandstone, or fractured limestone?
- Are there constrictions, pockets, or pin scars?
Then match your gear accordingly:
Optimist You:
“Just follow these four steps!”
Grumpy You:
“Ugh, fine—but only if I get to rant about people using tricams like doorstops.”
- Evaluate the crack profile. Run your fingers along the walls. Tap with a nut tool. Listen for hollow sounds.
- Select your anchor type based on width, depth, and constriction (see Section 3).
- Place and test: Give a firm tug in the expected direction of pull. Does it hold? Does it walk?
- Extend and equalize: Use slings or cordelettes to reduce extension and distribute load evenly across multiple pieces.
Best Practices for Each Crack Anchor Type
What are the main crack anchor types—and when should I use them?
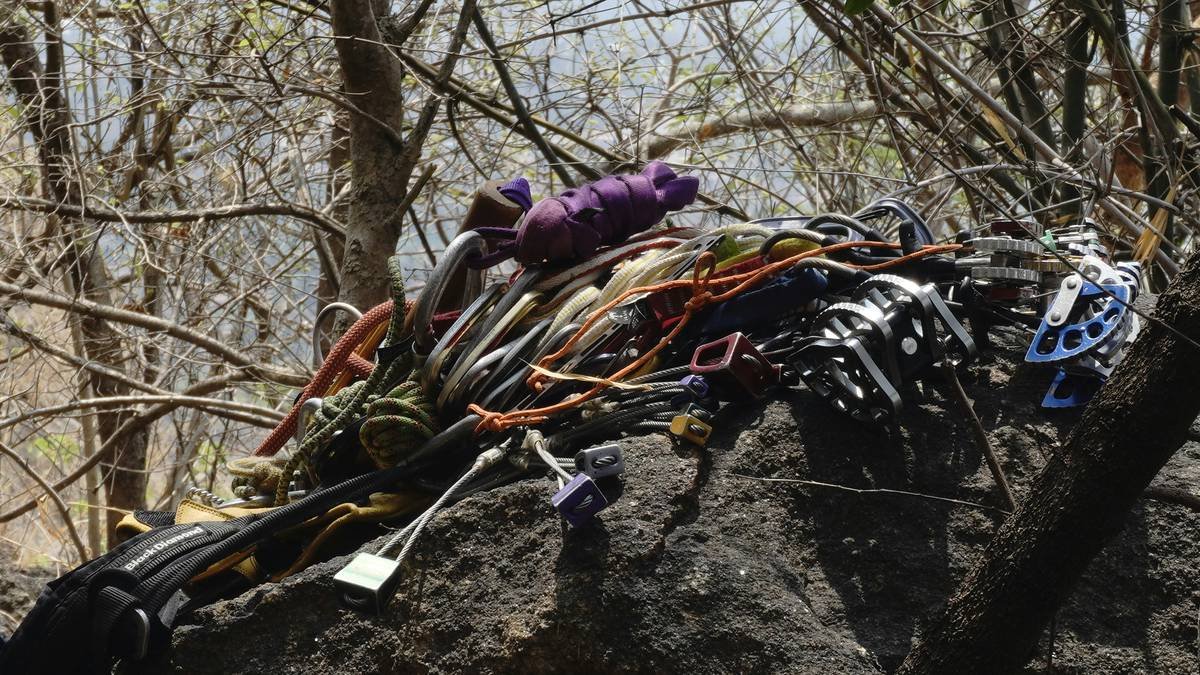
Not all anchors are created equal. Below are the five primary crack anchor types used in modern trad climbing:
- Passive Nuts (Stoppers, Wires): Ideal for clean, constricting cracks with parallel or slightly tapering walls. Best in granite or quartzite. Avoid in flared or soft rock (like sandstone)—they’ll just pull out.
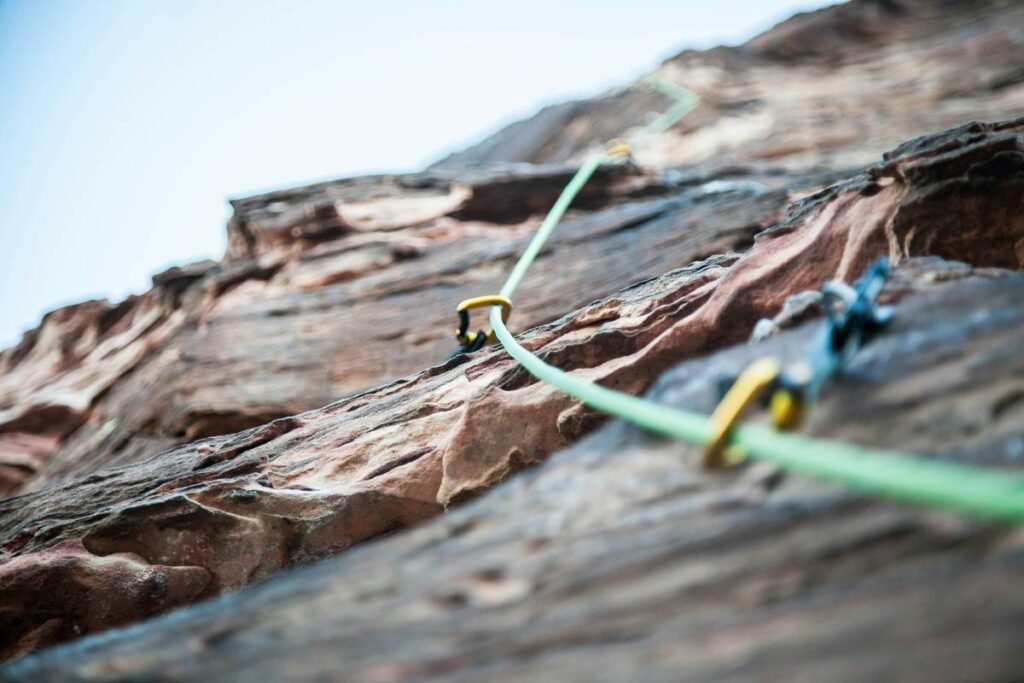
- Spring-Loaded Camming Devices (SLCDs / Cams): King of irregular or flared cracks. Place so lobes contact solid rock at 45–70° angles. Never place in shallow placements or where rock is loose.
- Hexes: Underrated! Work well in wider parallel cracks or pin scars. Can be used passively (like nuts) or actively (camming action). Great for alpine racks due to weight savings.
- Tricams: Niche but lifesavers in flared, shallow, or irregular cracks where cams won’t fit. Must be “set” with a sharp downward pull to engage camming action. Don’t trust them in wet or icy cracks.
- Pitons (in pin scars): Only use where historically placed and acceptable (e.g., Yosemite big walls). Never hammer new pitons—that’s unethical and banned in most U.S. crags.
Terrible Tip Disclaimer: “Just clip the biggest cam you have—it’ll hold anything!” Nope. Over-cammed placements in shallow cracks increase leverage and can cause catastrophic failure. I once saw a #5 Camalot rip out of a 4-inch flared crack because the outer lobes were barely touching rock. The climber fell 15 feet. Be precise, not lazy.
Rant Section: My Pet Peeve
People treating tricams like last-resort junk. Tricams saved my bacon on the Black Dike in Red Rock when the crack went from fingers to off-fingers with zero constrictions. A red tricam set cleanly held my leader fall. Respect the tricam. Learn to place it properly. Stop tossing it in the “mystery bin” of your rack.
Real-World Case Study: When Anchor Choice Saved Lives
Did crack anchor selection really prevent a fatal accident?
In October 2022, a two-person team was ascending the Kor-Ingalls Route (5.9+) in Indian Creek, Utah—a notoriously thin, parallel crack system in Wingate sandstone.
The second, cleaning the pitch, needed to build an anchor mid-crack to lower off safely. The crack was 1.25 inches wide, perfectly parallel, and deep. Many climbers would default to cams here—but sandstone is soft, and cams can track or damage the rock.
Instead, they placed three micro nuts (#3, #4, #5 BD Stoppers) in constrictions 6 inches apart, extended them with dyneema slings, and built a master point with a sliding X. When the second weighted the anchor during the lower, one nut pulled—but the other two held, arresting the fall with minimal extension.
According to the AAC incident report: “The use of passive protection minimized rock damage and provided redundant security in a medium-strength rock type.” Had they used a single cam, it likely would’ve tracked or popped under dynamic load.
FAQs About Crack Anchor Types
What’s the safest crack anchor type?
There’s no single “safest” type—it depends on rock, crack shape, and context. In solid granite with constrictions, nuts are incredibly reliable. In flared cracks, well-placed cams win. Redundancy and proper equalization matter more than gear brand.
Can I use cams in parallel cracks?
Yes—but ensure full lobe contact and avoid over-camming. In very parallel cracks (like Indian Creek), passive gear often provides cleaner, more secure placements without damaging the rock.
How do I know if a crack is too flared for passive gear?
If your nut falls out when you let go, it’s too flared. Passive gear needs a constriction narrower than the nut’s widest point. No constriction = no purchase.
Are tricams reliable for lead protection?
Yes—if placed correctly. They must be “set” with force and oriented so the stem points in the direction of pull. Never clip the webbing loop alone; always clip the metal head.
Should I avoid pitons entirely?
On established aid routes with existing pin scars (like El Cap), yes—use them responsibly. But never place new pitons on free climbs or in pristine cracks. It’s unethical, illegal in many areas, and damages the rock.
Conclusion
Mastering crack anchor types isn’t about memorizing gear catalogs—it’s about reading rock like a language, respecting its limits, and building systems that forgive human error. Whether you’re plugging a micronut in Yosemite or slinging a hex in the Wind Rivers, your anchor choices reflect your expertise, experience, and commitment to coming home safely.
So next time you’re staring into a blank-looking crack, don’t just “shove something in.” Pause. Assess. Choose wisely. Because gravity doesn’t care how cool your rack looks—it only cares if your anchor holds.
Like a 2003 Nokia ringtone, some things never go out of style: redundancy, inspection, and humility in the face of vertical stone.
Haiku:
Granite whispers low—
Steel bites deep in constricted stone.
Trust, but test each hold.