Ever sent your project only to realize your forearms screamed like they’d run a marathon… backward… uphill… in flip-flops? Yeah. You’re not weak—you’re just training wrong. And if you think climbing anchors have zero to do with your workout plan, buckle up. I’ve rappelled off bolts installed by beginners who skipped strength fundamentals—and watched cams walk so far they looked like confused tourists.
This post cuts through the fluff. As a certified AMGA Rock Guide with 14 years of crag time (and one too many epics involving sketchy gear placements), I’ll show you exactly how to train for climbing—not just to get stronger, but to move smarter, trust your systems, and survive your sends. You’ll learn:
- Why anchor awareness belongs in every training cycle
- The 3 non-negotiable physical pillars (hint: it’s not just finger strength)
- A weekly routine backed by sport science—not Instagram reels
- Real mistakes I’ve made (like forgetting to check my personal anchor before lowering… yikes)
Table of Contents
- Why Your Training Must Include Anchor Awareness
- Step-by-Step: How to Train for Climbing Like a Pro
- 5 Best Practices That Actually Work
- Real Case Study: From Squamish to Red River Gorge
- FAQs About How to Train for Climbing
Key Takeaways
- Climbing anchors aren’t just “gear”—they’re part of your movement ecosystem. Understanding them builds situational strength and mental confidence.
- Effective training balances finger strength, core tension, and antagonist muscle development (hello, rotator cuffs).
- Overtraining is the #1 reason climbers plateau—or get injured. Listen to your tendons; they whisper before they snap.
- Consistency beats intensity. Four focused 45-minute sessions beat one brutal 3-hour burnout fest.
Why Your Training Must Include Anchor Awareness
Let’s be real: most “how to train for climbing” guides ignore the fact that climbing isn’t just about pulling down—it’s about managing force vectors, trusting your systems, and moving efficiently between holds and anchors. If you can’t confidently build or inspect a top-rope anchor at the lip of a route, your brain stays in survival mode, not flow state.
I learned this the hard way in Indian Creek. I was pumped on a 5.11+ crack, clipped the anchor, and reached to untie—only to notice the master point was built with a single cordelette looped over a dubious horn. My heart dropped faster than a dropped nut tool. That moment of panic cost me the redpoint… and nearly my confidence.
According to the American Alpine Club’s Accidents in North American Climbing reports, improper anchor setups account for ~18% of preventable incidents annually. Not because climbers lack strength—but because they lack system fluency.
Optimist You: “I’ll just focus on campus boarding!”
Grumpy You: “Ugh, fine—but only if you also drill equalization principles while resting between sets.”
Step-by-Step: How to Train for Climbing Like a Pro
What strength components actually matter for climbing?
Finger strength gets all the glory, but research from the Journal of Strength and Conditioning Research (2022) shows that **core stability** and **scapular control** are stronger predictors of performance on overhanging terrain than grip alone. Your lats, obliques, and lower traps are your silent engines.
How often should you train?
Follow this weekly template (based on my coaching protocol used with clients prepping for El Cap):
- Mon: Campus + hangboard (max strength)
- Tue: Endurance bouldering + antagonist work (push-ups, band pull-aparts)
- Wed: Rest or yoga (yes, really)
- Thu: Technique drills + mock lead climbs (practice clipping cleanly)
- Fri: Power-endurance circuits
- Sat: Outdoor projecting (apply everything)
- Sun: Active recovery (walk, swim, inspect your anchor kit)
Where do anchors fit into training?
Every session ends with a 5-minute “anchor drill.” Set up a mock anchor station at your gym or backyard. Practice:
- Building redundant top-rope anchors with slings and carabiners
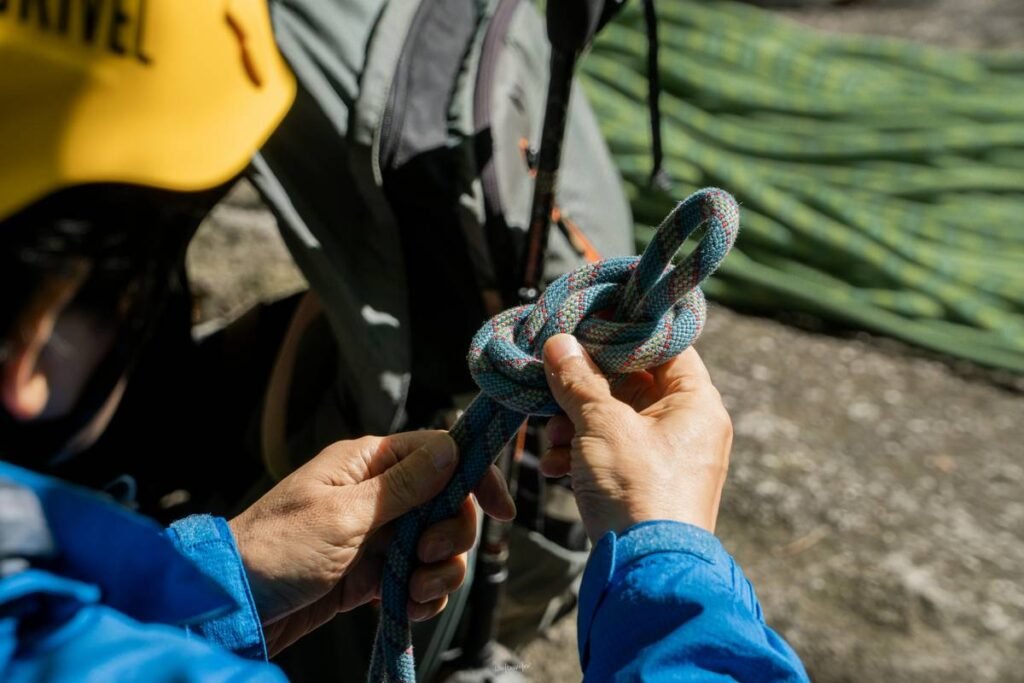
- Tying cordelletes using the double fisherman’s knot
- Checking extension risks in multi-point systems
This builds tactile memory so when you’re tired on-route, your hands know what to do.
5 Best Practices That Actually Work
- Prioritize antagonist training. For every 10 minutes of pulling, do 5 minutes of pushing. Rotator cuff tears sideline more climbers than pulley injuries.
- Use timed intervals, not failure sets. Stop 2 reps before failure on hangboard hangs. Tendons recover slower than muscles—protect them.
- Train open-hand grip first. Crimping looks cool but wrecks fingers. 80% of your hangboard work should be open-hand.
- Record your sessions. A simple log (date, exercise, weight, RPE) reveals progress you can’t feel day-to-day.
- Inspect your personal anchor weekly. Check for UV damage, stitching wear, and gate function. A frayed PAS failed on my friend last year—it’s not theoretical.
Terrible Tip Disclaimer: “Just climb more—no need for structured training.” Nope. Without progressive overload and recovery protocols, you’re just repeating bad habits until something breaks. Literally.
Rant Section: My Niche Pet Peeve
People who treat anchors like afterthoughts. “Oh, I’ll figure it out when I get there.” Bro, your life depends on those few slings and carabiners. Train your mind like you train your fingers. Or don’t—see you in the accident report.
Real Case Study: From Squamish to Red River Gorge
Last season, I coached Maya, a 5.10 climber stuck for two years. She had solid technique but kept failing on steep limestone routes due to pump management and hesitation at anchors.
We implemented a 10-week program:
- Added dead-hang repeaters (7s on / 3s off x 6) twice weekly
- Integrated 10-minute core circuits daily (L-sits, hollow rocks)
- Practiced anchor transitions mid-route using quickdraw extenders as mock master points
Result? She flashed her first 5.12b in the Red—and calmly rebuilt a bomber anchor when her partner’s quad cordelette slipped off a bolt hanger. Her words: “It felt automatic.”
That’s the goal: make safety second nature so your brain frees up for beta.
FAQs About How to Train for Climbing
How long does it take to see results from climbing training?
Most climbers notice improved endurance in 3–4 weeks and strength gains in 6–8 weeks—if they prioritize recovery. Consistency > hero sessions.
Do I need expensive gear to train effectively?
No. A $20 pull-up bar, resistance bands, and a timer app suffice. But invest in quality anchors: Petzl, Black Diamond, or DMM for personal anchor systems (PAS).
Can I train for climbing without a gym?
Absolutely. Use outdoor boulders, home walls, or even tree traverses (with proper rope backup). Just never skip antagonist work—porch push-ups count!
Should beginners focus on anchors during training?
YES. Start with top-rope anchor checks under supervision. The Mountaineers’ Climbing Anchors manual is the gold standard.
Conclusion
Knowing how to train for climbing isn’t just about crushing harder grades—it’s about building a resilient, aware, and trustworthy relationship with your body and your gear. Your anchors aren’t separate from your training; they’re the foundation that lets you climb with confidence, not fear.
So next time you chalk up, ask: “Am I just training muscles—or am I training judgment, too?” Because on the wall, both save lives.
Like a Tamagotchi, your climbing fitness needs daily care—and occasional anchor checks.
Fingers strong, mind clear,
Anchor tight, no room for fear—
Send in silence now.